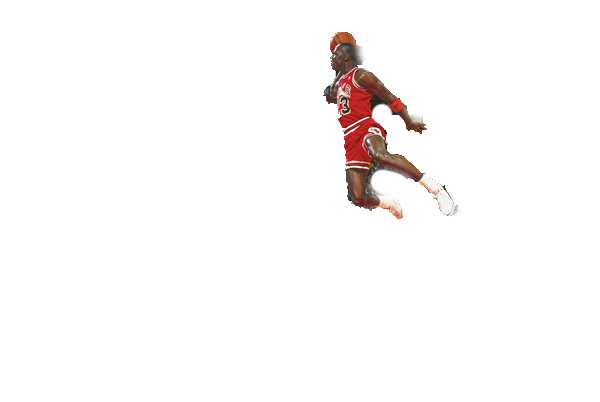
step 1 - Download Images
|
| ||||
Next, open them in Photoshop
Step 2 - Grayscale Background
| 1) Click on the full picture (person and background) 2) Click on IMAGE at the top. 3) Choose MODE and then GRAYSCALE 4) Click the DISCARD button 5) Click on IMAGE at the top once again. 6) This time, choose MODE and then RGB Color 7) It may look like nothing happens but at the top, on the tab with the name of the file, it will change from Gray to RGB/8 | 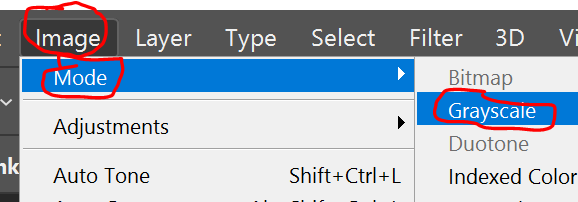 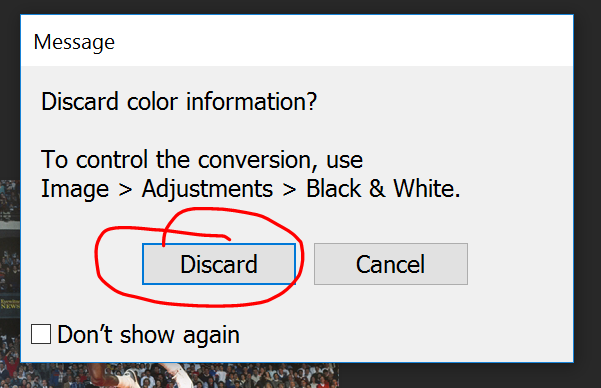 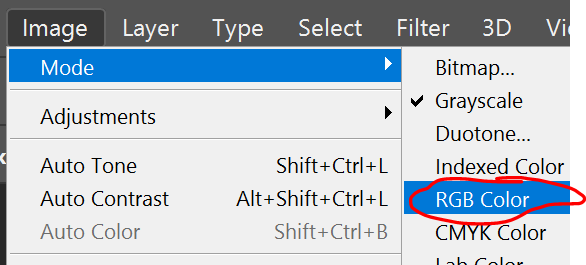 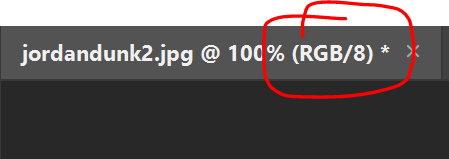 |
Step 3 - Cut and PAste PErson in Color
| 1) Now, click over to the person with the background removed. 2) Click on the Magic Wand tool 3) Everything should be selected. 4) Then go to Select -> Inverse 5) Just the person should now be selected. 6) Edit -> Copy 7) Click over to the now GRAYSCALE background 8) Edit-> Paste 9) You should now have a person in color on a grayscale background | 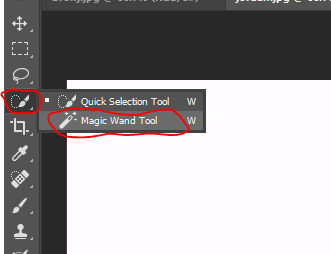  |
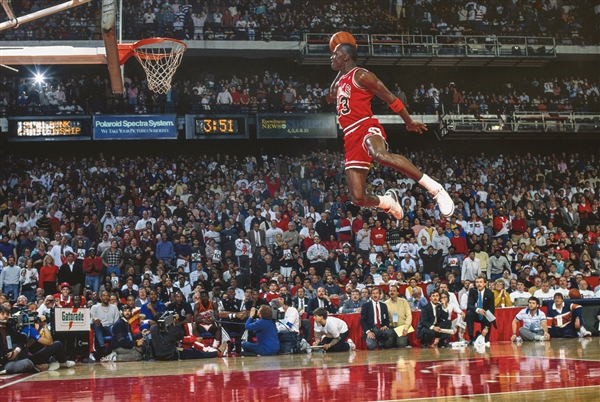
Step 4 - Creating the Blur
| 1) Use the MOVE tool to move the person in color on top of the grayscale person 2) Go to Edit -> Paste again 3) Now you should have 2 persons in color 4) At the top of your screen, go to Blur -> Motion Blur 5) A new window will appear. 6) Change the angle to -15 and change the Distance to 68-70 pixels (you can adjust the blur to however you want...this is a suggestion...) 7) Click OK | 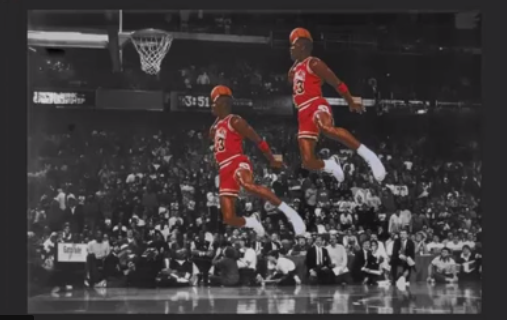 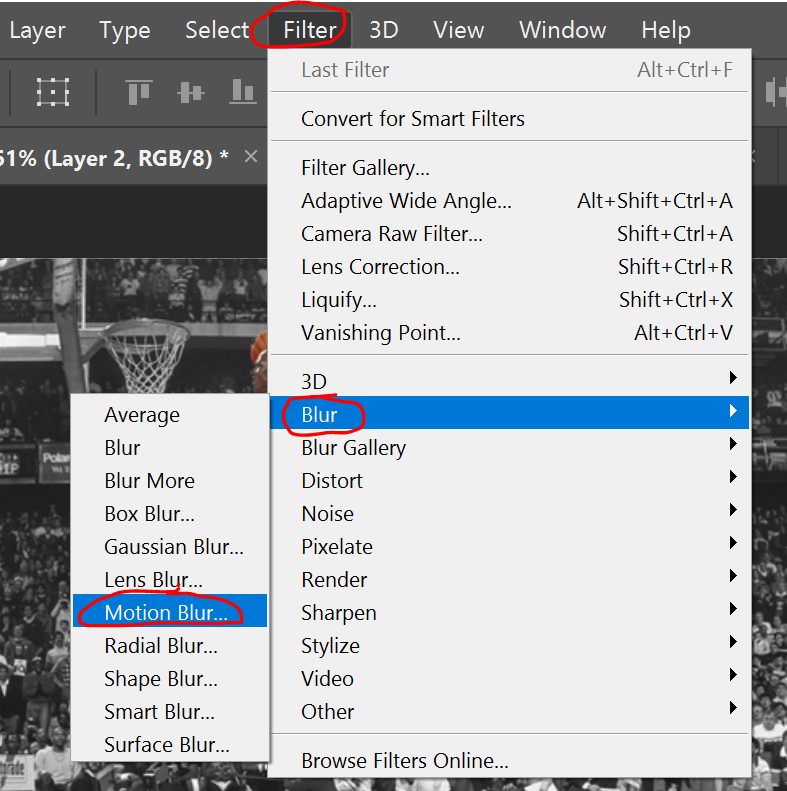  |
Step 5 - Adjusting the Blur
| 1) Move the blurred person on top of the normal person 2) Then, on the right side, move Layer 1 on top of Layer 2 3) Adjust the blur by moving it to the left to look like you caught the person in motion. 4) If you don't like the look of the blur, try adjusting the ANGLE and DISTANCE again. | 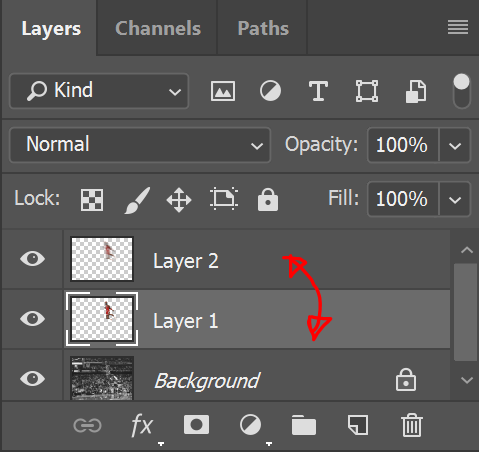 |
Step 6 - Practice
| 1) Cut out the person FIRST 2) Save it as: PERSON CUT OUT and as a JPEG 3) Open the original file again, 4) Do the blur technique. |
| ||
 RSS Feed